As it is not enough that ROTO roof windows are expensive as VIP part of the hell, but their accessories also follow this price insanity - the original extension pole is priced for about 35-40 euros, which is clearly a sign of capitalistic insanity. The logic is this - you don't have a choice, so you will buy it. Well, Roto, I have a statement to make: your logic is flawed.
Roto Roof Windows Extension Pole: How to DIY and save more than 35 €

mmmm bacon.
- First, you need something like a simple wooden pole. You can buy it in local DIY/hardware stores - the kind that have tools, electrical/plumbing supplies, metal and other funny parts that are usually mystical for a regular person. Make sure that the pole is at least 2.5cm - 3cm thick, and as long as you need to reach the window (calculate the size required with the OPEN window).

Simple wooden pole. It has no Bluetooth capabilities, nor an LCD screen. - In the same store, acquire a metal ringy-part called an eyebolt. I was googling for nearly an hour before I found how the damn thing is called in english. Mine is M12 - the inner circle/ring diameter is Ø 30 mm, and the outer ring size is Ø 55 mm. It is possible that a smaller one would do the trick - but not too much smaller.

An eyebolt. It is a bolt. With an eye. - Now bore a hole in the wooden pole top with the wooden drill. The thickness of the drill bit should correspond to the thickness of the bolt body (minus the bolt thread), and the drilled hole should be deep as a length of the bolt - more or less.

Wood drill bit. Made for drilling the wood. Fun stuff! - Now screw the eyebolt into the drilled hole in the wood pole. And that it is! You have your Roto roof window extension pole for a funny price. On the following pictures is my work, which was done in about 14 minutes. The work was tediously prolonged by my Parkside cordless screwdriver, whose battery was dying at the moment.
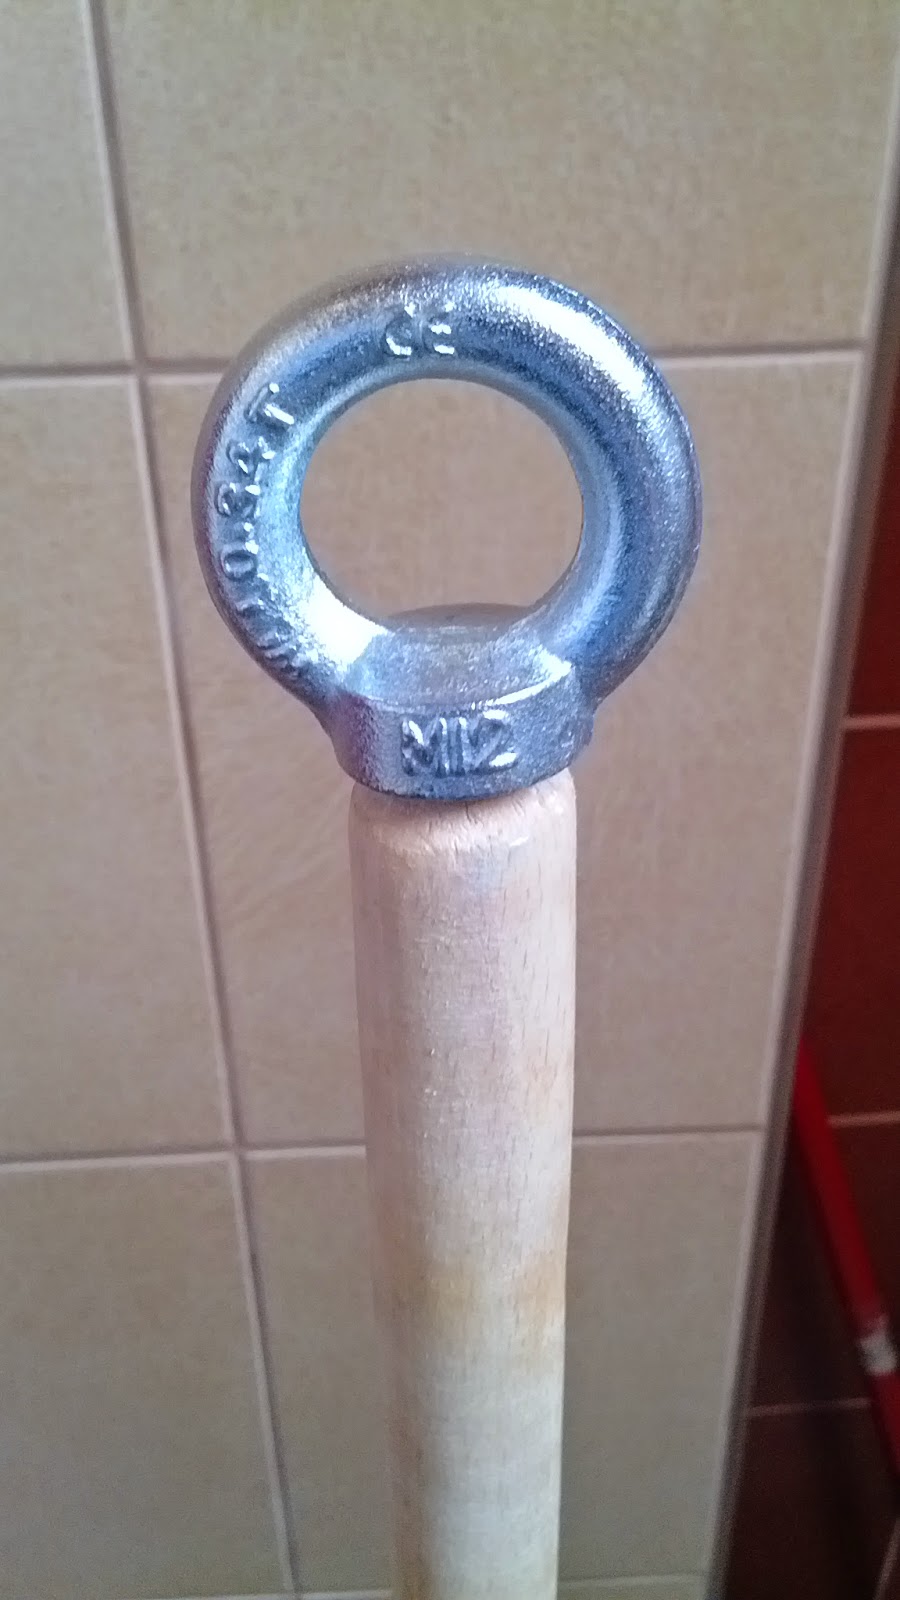 |
| Roto roof window extension pole alternative: the Eyebolt screwed onto the wooden pole. Still no Bluetooth nor LCD, but... |
 |
| ... it works lovely! |
Roto roof window extension pole alternative The Good:
- Cheap, fast, DIY, it works.
Roto roof window extension pole alternative The Bad:
- No Bluetooth. No LCD. No internet connection.
Further improvement suggestion(s):
- Make the eyebolt thing rubbery in some way, to keep it from damaging the plastic window handle coating.
You made me smile today, thank you for doing this, just ordered my eyebolt M12
ReplyDeletebroom fitting :D XXX
Mac
P.S windows will open!